This post may contain affiliate links. If you make a purchase through links on our site, we may earn a commission.
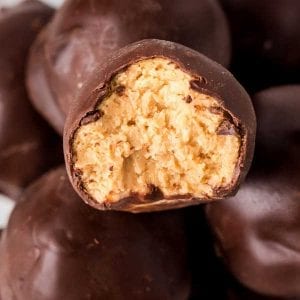
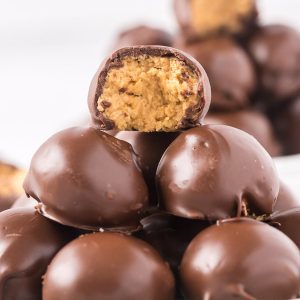
These Butterfinger Balls are a delicious no bake treat that are perfect for holiday party. If you are lover of Butterfinger Candy Bars, then you need to make these dessert.
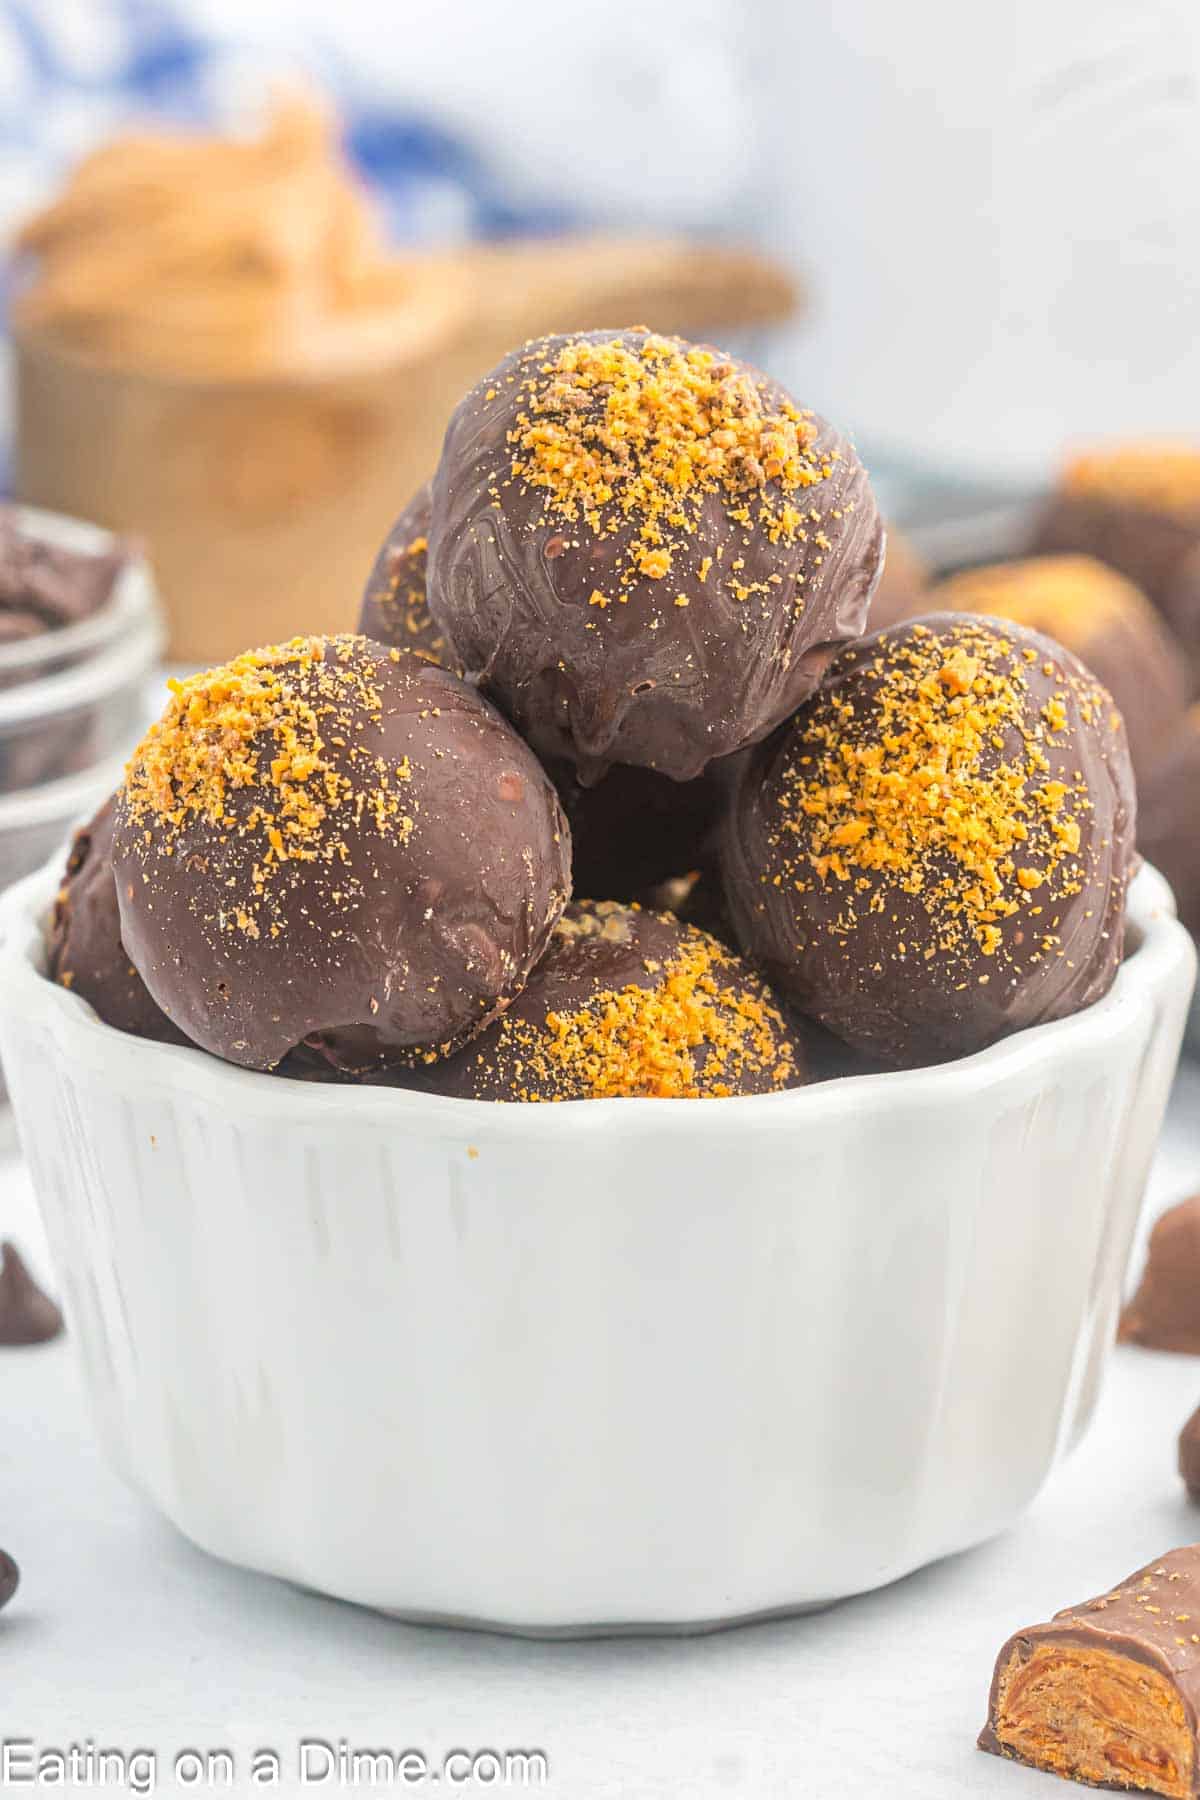
If you have made this Butterfinger Pie, then you are going to love these Butterfinger Balls. You will love the taste and how easy they are to make.
This no bake dessert is a family favorite and the perfect holiday treat.
Table of Contents
Why We Love This Recipe
I love Butterfinger Candy Bars, so I knew I would love this recipe. Butterfinger pieces are combined with peanut butter mixture to create a no bake dessert.
Dipping the peanut butter balls into the melted chocolate makes them even better. It is my favorite combination and perfect treat for any occasion.
Ingredients

- Peanut Butter – You can also use crunchy peanut butter
- Chocolate Chips Semi-Sweet – You can also use melting wafers or chocolate almond bark
- Coconut Oil – You can also use vegetable oil
Scroll to the bottom for the full recipe in the recipe card.
Variations Ideas
- Rice Krispies – Add rice krispies to change the flavor or texture to these treats.
- White Chocolate – You can also melt white chocolate to change the chocolate candy coating.
How to Make Butterfinger Balls

Step 1 – Combine peanut butter, butter and vanilla with a mixer on medium until fluffy.

Step 2 – Mix in powdered sugar a little bit at a time until incorporated.
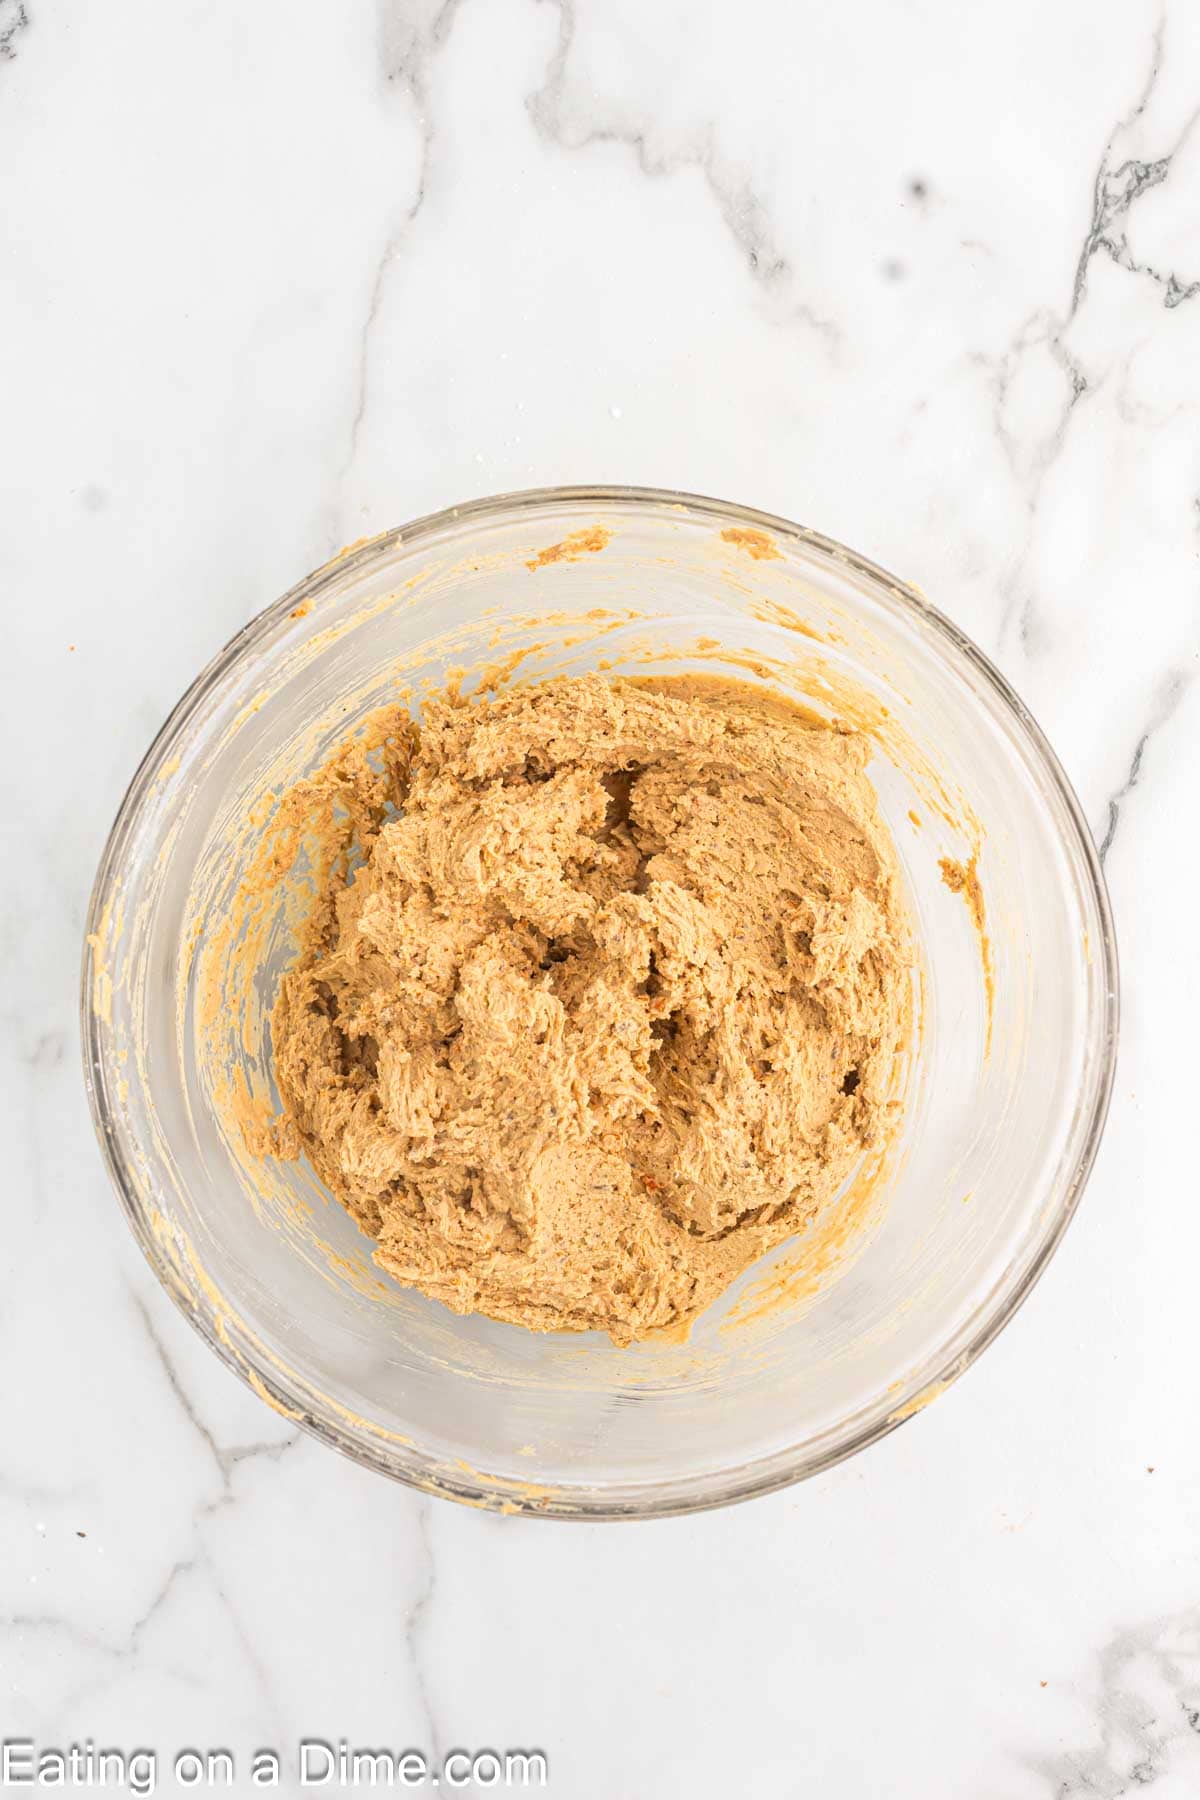
Step 3 – Stir in the crushed butterfinger bars (reserve some for topping). Chill mixture for 30 minutes.

Step 4 – Roll into 1-inch balls and place on a parchment lined pan. Chill mixture for 30 minutes.

Step 5 – Combine chocolate chips and oil in a small bowl. Microwave at 50% power for 1 minute. Stir and continue microwaving in 30 second increments just until melted.

Step 6 – Using a fork to dip each ball into chocolate to completely coat. Shake off excess and return to the pan and top with the reserved crushed butterfinger bars.
- Step 7 – Continue this process until all the balls are coated with the chocolate.
- Step 8 – Allow the chocolate to set at room temperature.
- Step 9 – Then the butterfinger balls are ready to serve and enjoy!
Expert Tips
- Making Peanut Butterfinger Balls – We recommend using a cookie scoop to make sure the balls even.
- Making Peanut Butter Mixture – To help the balls stick together, make sure to chill them before dipping into chocolate.
- Crushing Butterfinger Candy Bars – Crush the candy bars into butterfinger bits with a food processor. You can also place the candy bars in a zip lock bag and crush with a rolling pin or a meat mallet.
- Melt Chocolate Chips – Carefully melt the chocolate chips in the microwave. Melt in 30 second intervals to ensure that you do not burn the chocolate.
- Dipping Balls – Insert a fork or a toothpick into the balls to easily dip into the melted chocolate.
- Lined Baking Sheet – Line the baking sheet with parchment paper to prevent the butterfinger buckeyes from sticking and also helps for an easy cleanup.

Frequently Asked Questions
Do not use all natural peanut butter for this recipe as it doesn’t mix with the other ingredients well.
Store the leftovers in an airtight container in the refrigerator. These butterfinger bites will last about 5-7 days.
Yes, you can freeze butterfinger balls. We recommend flash freezing the balls on a baking sheet for about an hour. Then remove the balls from the baking sheet and place in a freezer safe container. This will allow you take a small amount at a time. These butterfinger balls will last about 3 months if stored properly.

More Easy No Bake Desserts
Easy Thanksgiving
Peanut Butter Balls

Easy Dessert
Peppermint Oreo Balls
Easy No Bake
Chocolate Peanut Butter Balls with Rice Krispies
We love to hear from you. If you make these Butterfinger Balls, make sure to leave us a star review.

Butterfinger Balls
Ingredients
- 1 ½ cups peanut butter
- ½ cup butter softened
- ½ teaspoon vanilla
- 2 cups Powdered Sugar
- 1 cup Crushed Butterfinger Bars
- 3 cups chocolate chips semi-sweet
- 1 tablespoon coconut oil or vegetable oil
Instructions
- Combine peanut butter, butter and vanilla with a mixer on medium until fluffy.
- Mix in powdered sugar a little bit at a time until incorporated.
- Stir in the crushed butterfinger bars (reserve some for topping). Chill mixture for 30 minutes.
- Roll into balls and place on a parchment lined pan. Chill mixture for 30 minutes.
- Combine chocolate chips and oil in a small bowl. Microwave at 50% power for 1 minute. Stir and continue microwaving in 30 second increments just until melted.
- Using a fork to dip each ball into chocolate to completely coat. Shake off excess and return to the pan and top with the reserved crushed butterfinger bars.
- Continue this process until all the balls are coated with the chocolate.
- Allow the chocolate to set at room temperature.
- Then the butterfinger balls are ready to serve and enjoy!


Yes you can!
I like peanut butter cups better than butterfingers. Can I swap any crushed candy for it?
These butterfinger balls made the perfect treat!