This post may contain affiliate links. If you make a purchase through links on our site, we may earn a commission.
If your kids are into Minecraft, then you need to make this Minecraft Birthday Cake. Easy steps to create a memorable cake for your Minecraft Birthday Parties.
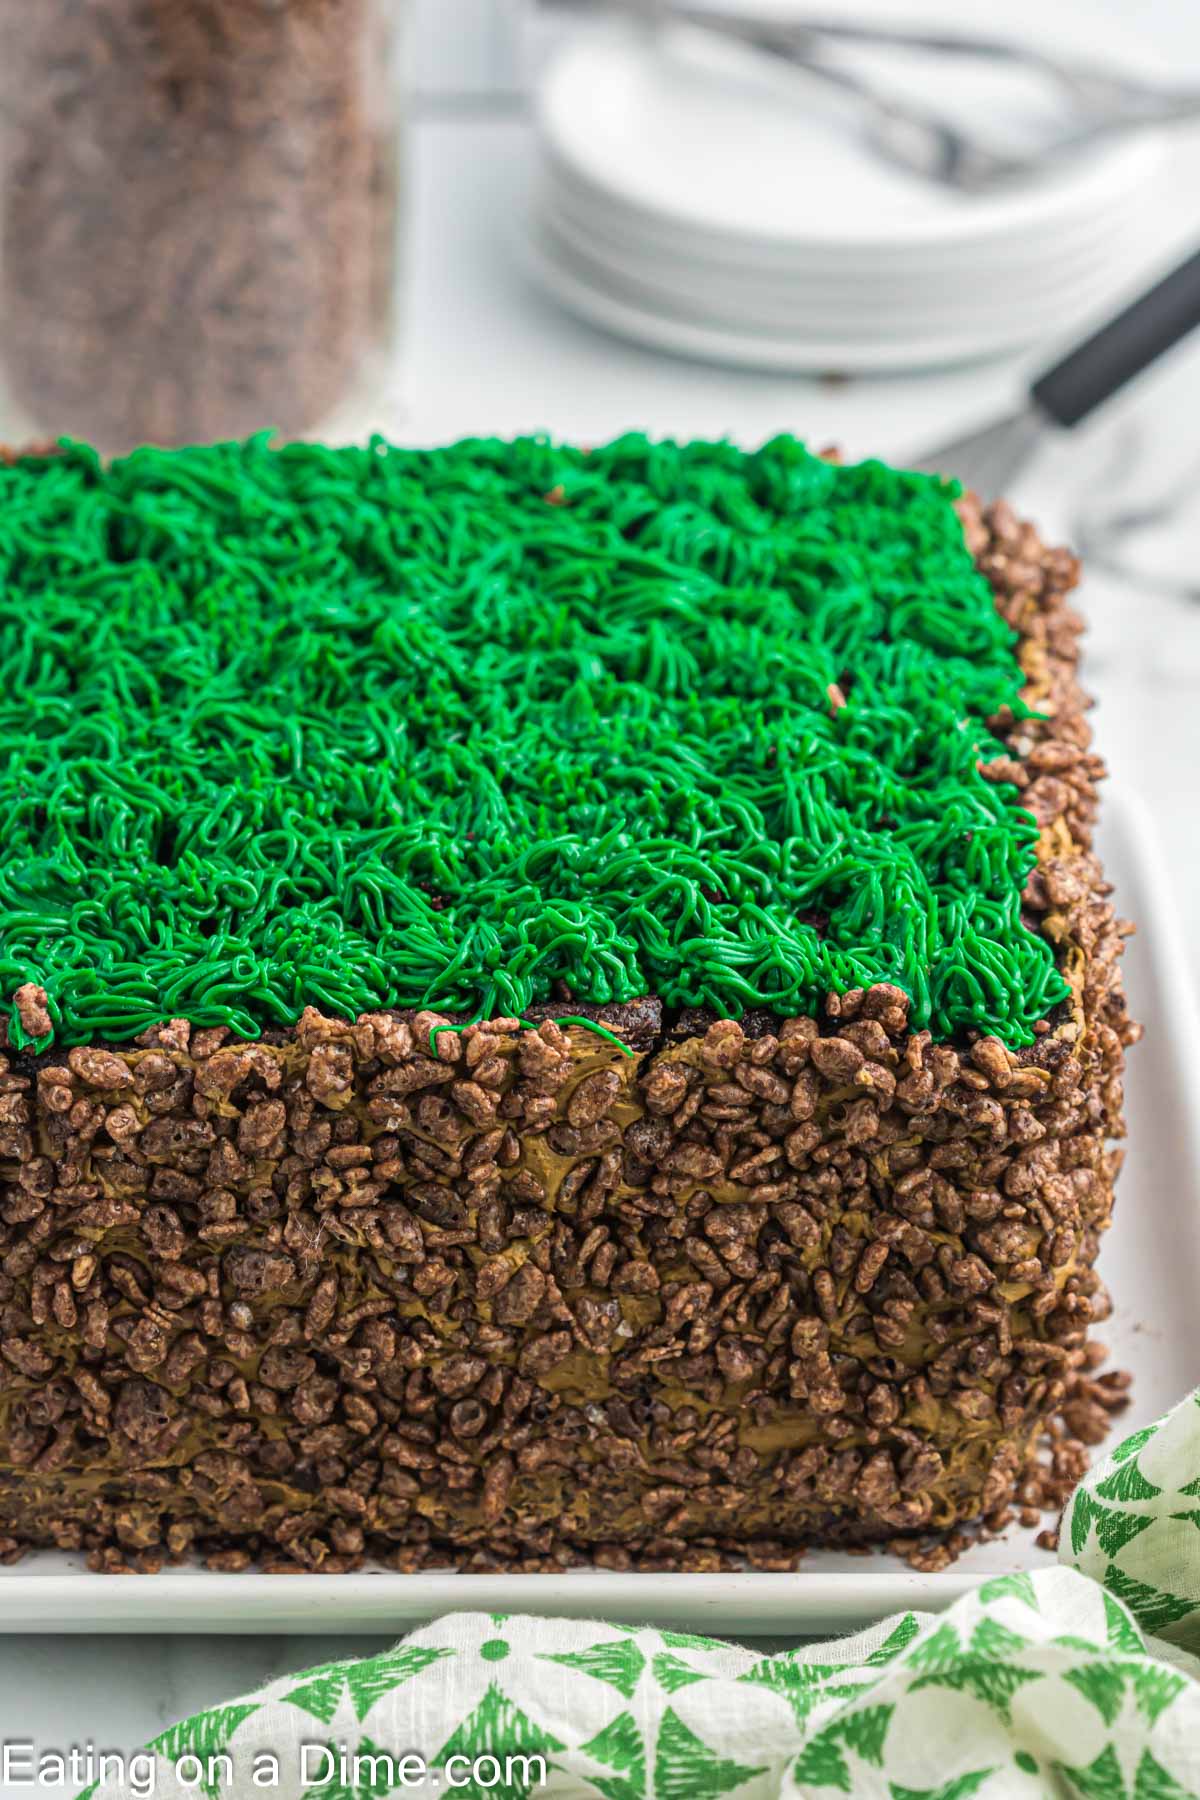
My boys LOVE Minecraft, so they wanted a Minecraft party for their birthday party. That means I had to make a Minecraft birthday cake.
Honestly, I knew very little about Minecraft so I had to check with them on every detail, especially the cakes. Making my kids cakes for their birthday is fun and easy to do with these easy cake recipes and cake decorating ideas.
If your kids are into Minecraft as much as mine, you might also like these minecraft cake pops.
Table of Contents
Supplies Needed:
The boys were very specific about which type of cake they each wanted. One boy wanted a cake that looked just like the cake block on Minecraft – white top, brown bottom and red squares on top. It was really easy to do.
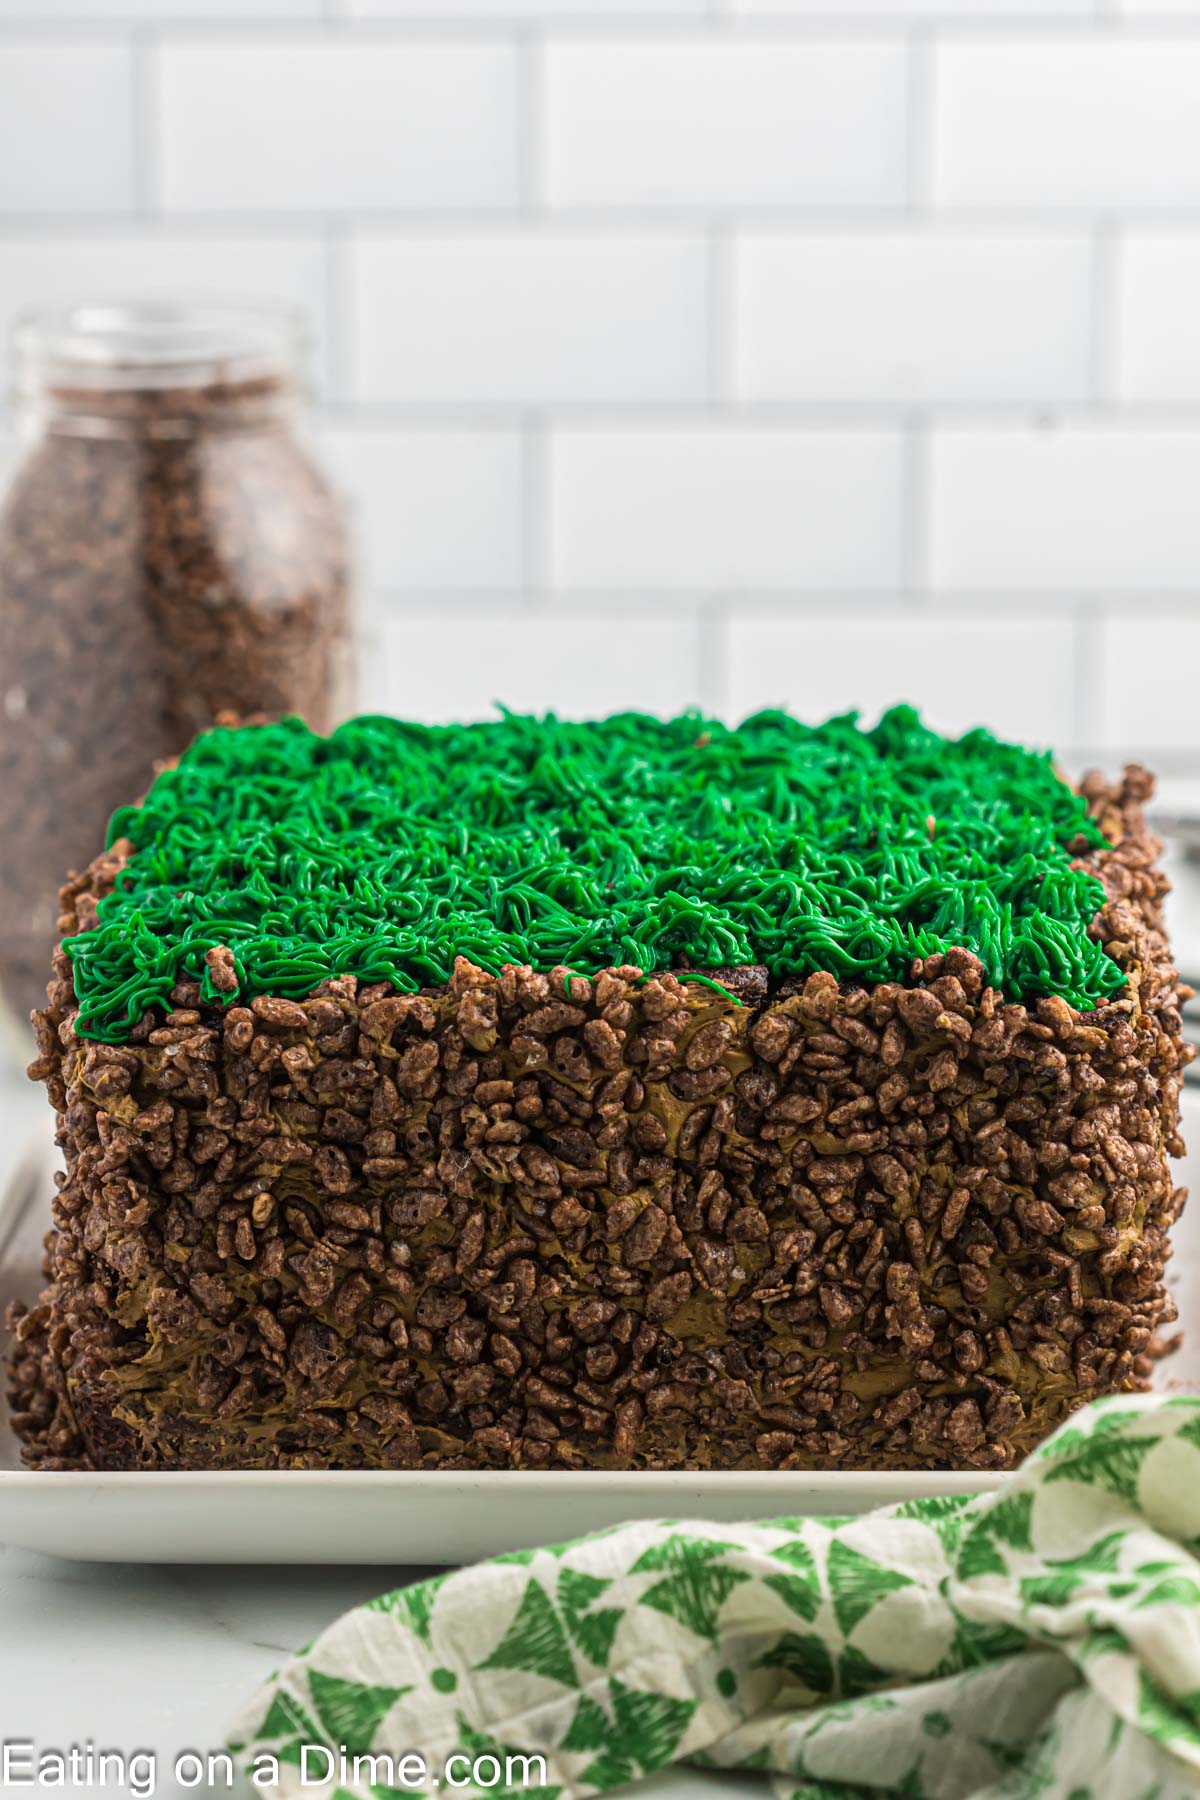
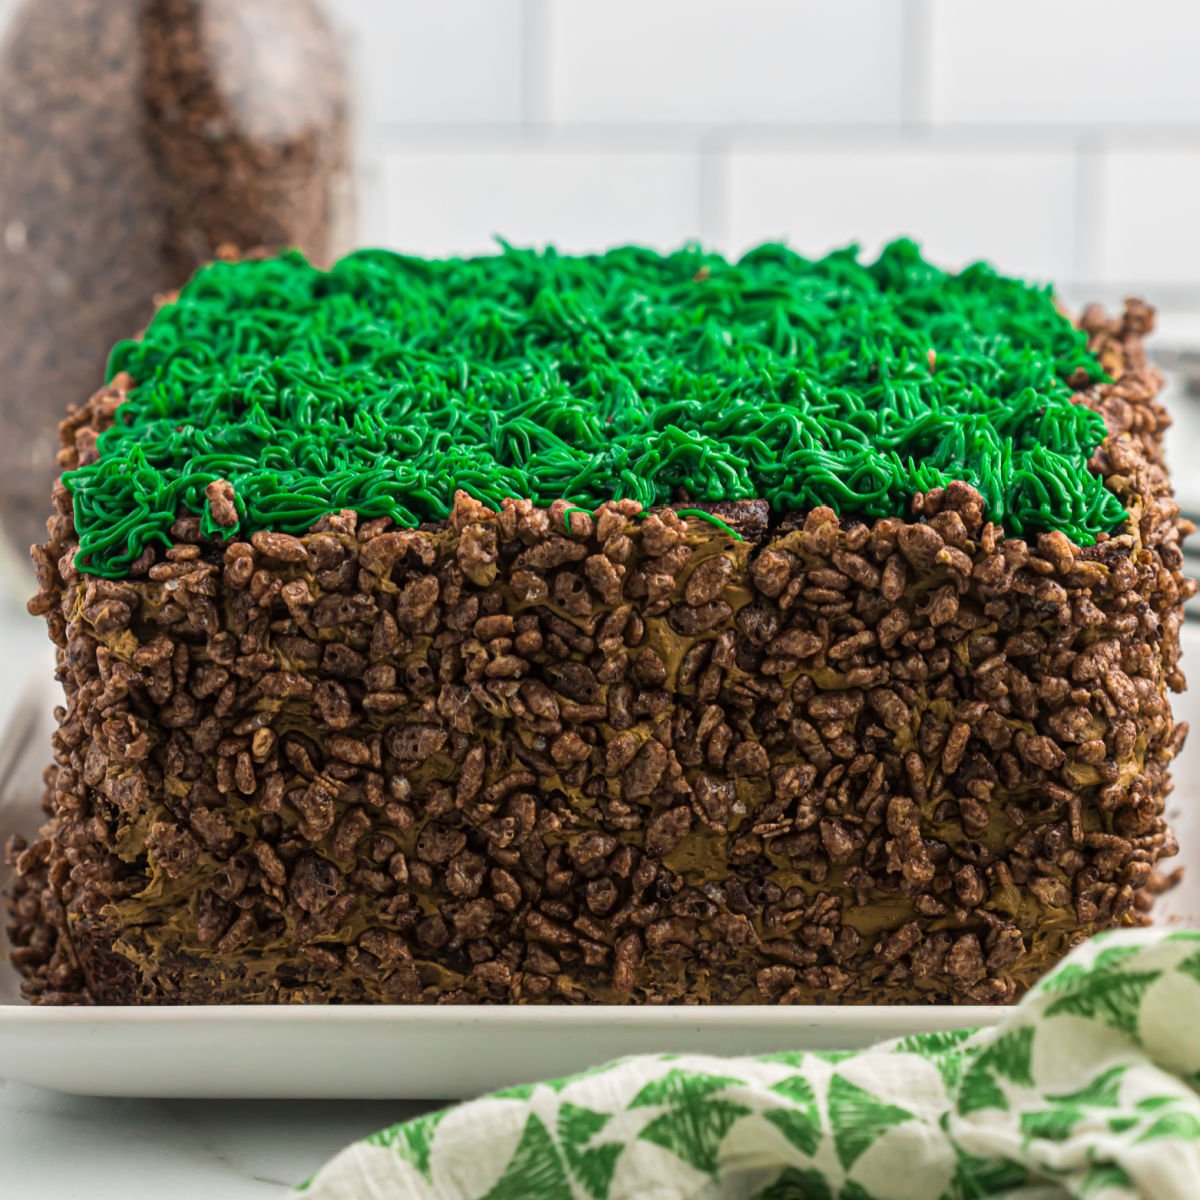
My other son wanted a cake to look like a grass block from Minecraft – ‘grass’ on top and brown all around the sides. So, today I wanted to show you how to make a Easy Minecraft Grass Block Cake.
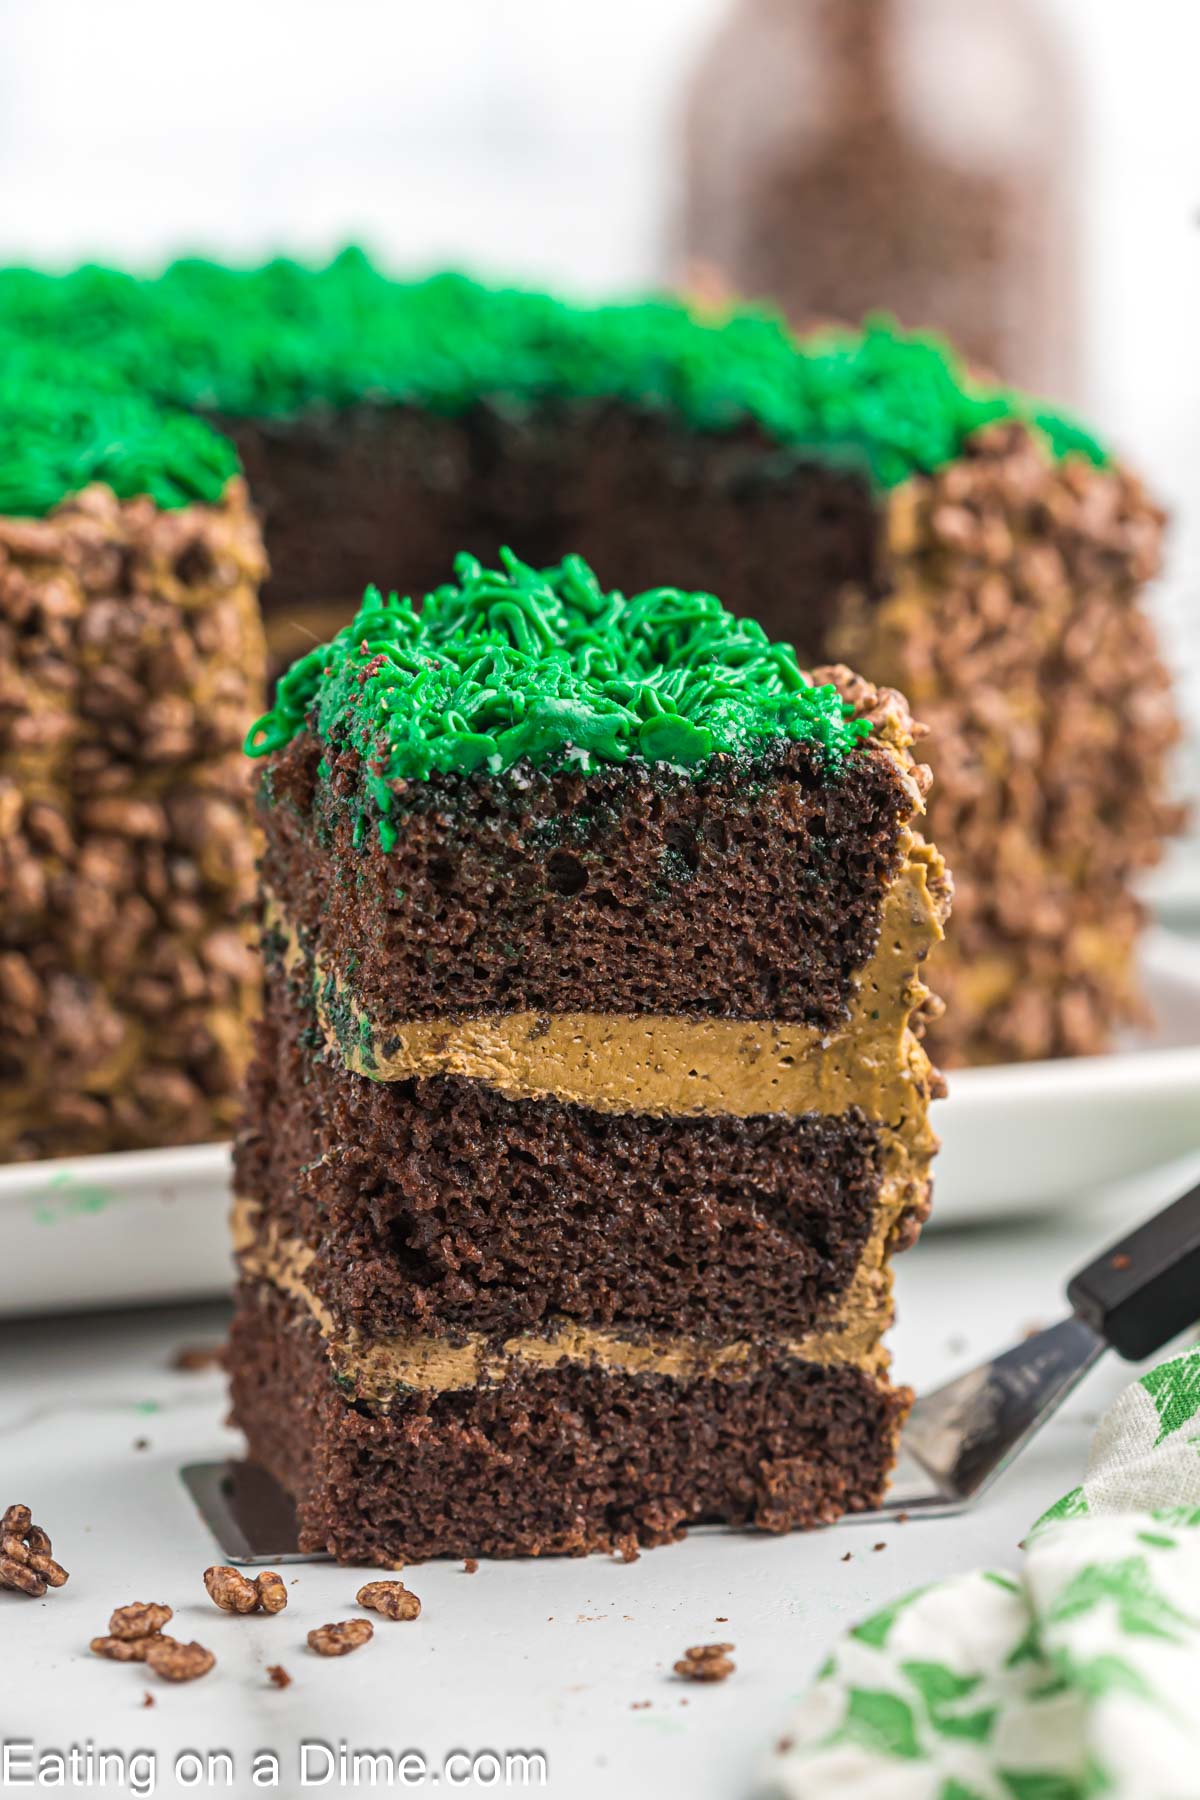
In order to make true block cakes, I used an 8-inch Wilton Square Cake Pan and made 3 layers per cake. I used one Betty Crocker Boxed Cake mix for each pan.
Ingredients:
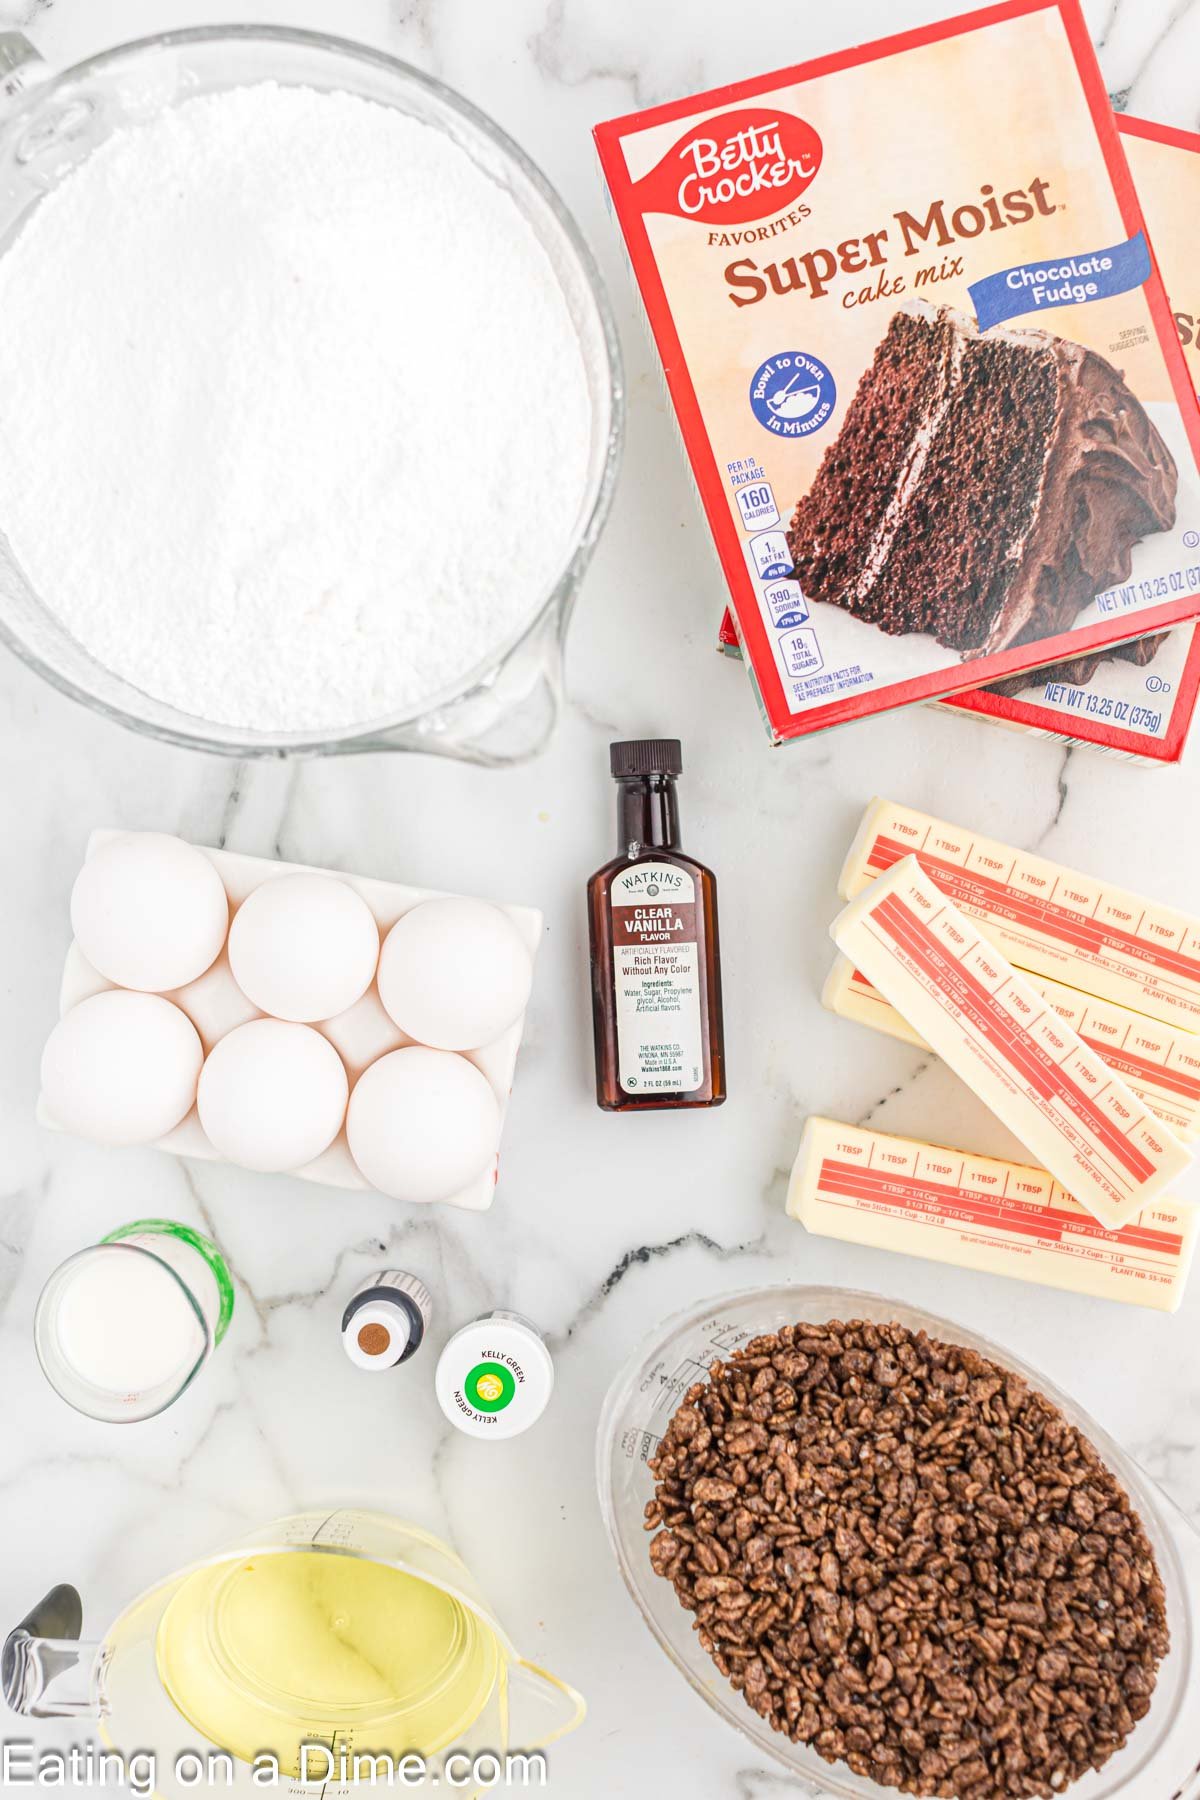
For the Cake:
- Chocolate Cake Mix
- Water, divided
- Vegetable Oil, divided
- Eggs, divided
For the Frosting:
- Butter softened
- Clear Vanilla Extract
- Sifted Confectioners Sugar
- Milk
- Green Gel Food Coloring
- Brown Gel Food Coloring
- Cocoa Krispies
For the full list of ingredients and recipe, scroll to the bottom for the recipe card.
Variations Ideas:
- Cake Mix – Feel free to use different types of cake mixes.
- Cake Topper – You can easily add cake topper to this themed cake or make a creeper face.
- Cupcakes – You can easily make this cake into cupcakes with the same green frosting. Easy alternative for your Minecraft themed birthday party.
Step by Step Instructions:
Make the Cakes:
- Step 1 – Preheat the oven to 350 degrees Fahrenheit and spray 3 8 inch square cake pans with a non-stick cooking spray.
- Step 2 – In 2 separate bowls, mix together the cake mix, 1 cup of water, ½ cup vegetable oil and 3 eggs.
- Step 3 – Fill the prepared cake pans with the cake batter filling them up approximately 2/3 of the way full. You will not use all of the cake batter to fill the cake pans, so discard any remaining batter.
- Step 4 – Bake the cakes for 23-28 minutes until a toothpick inserted into the center of the cakes comes out clean.
- Step 5 – Let the cakes cool for 10 minutes and then carefully remove from the pans and allow them to cool completely on wire racks.
For the Frosting:
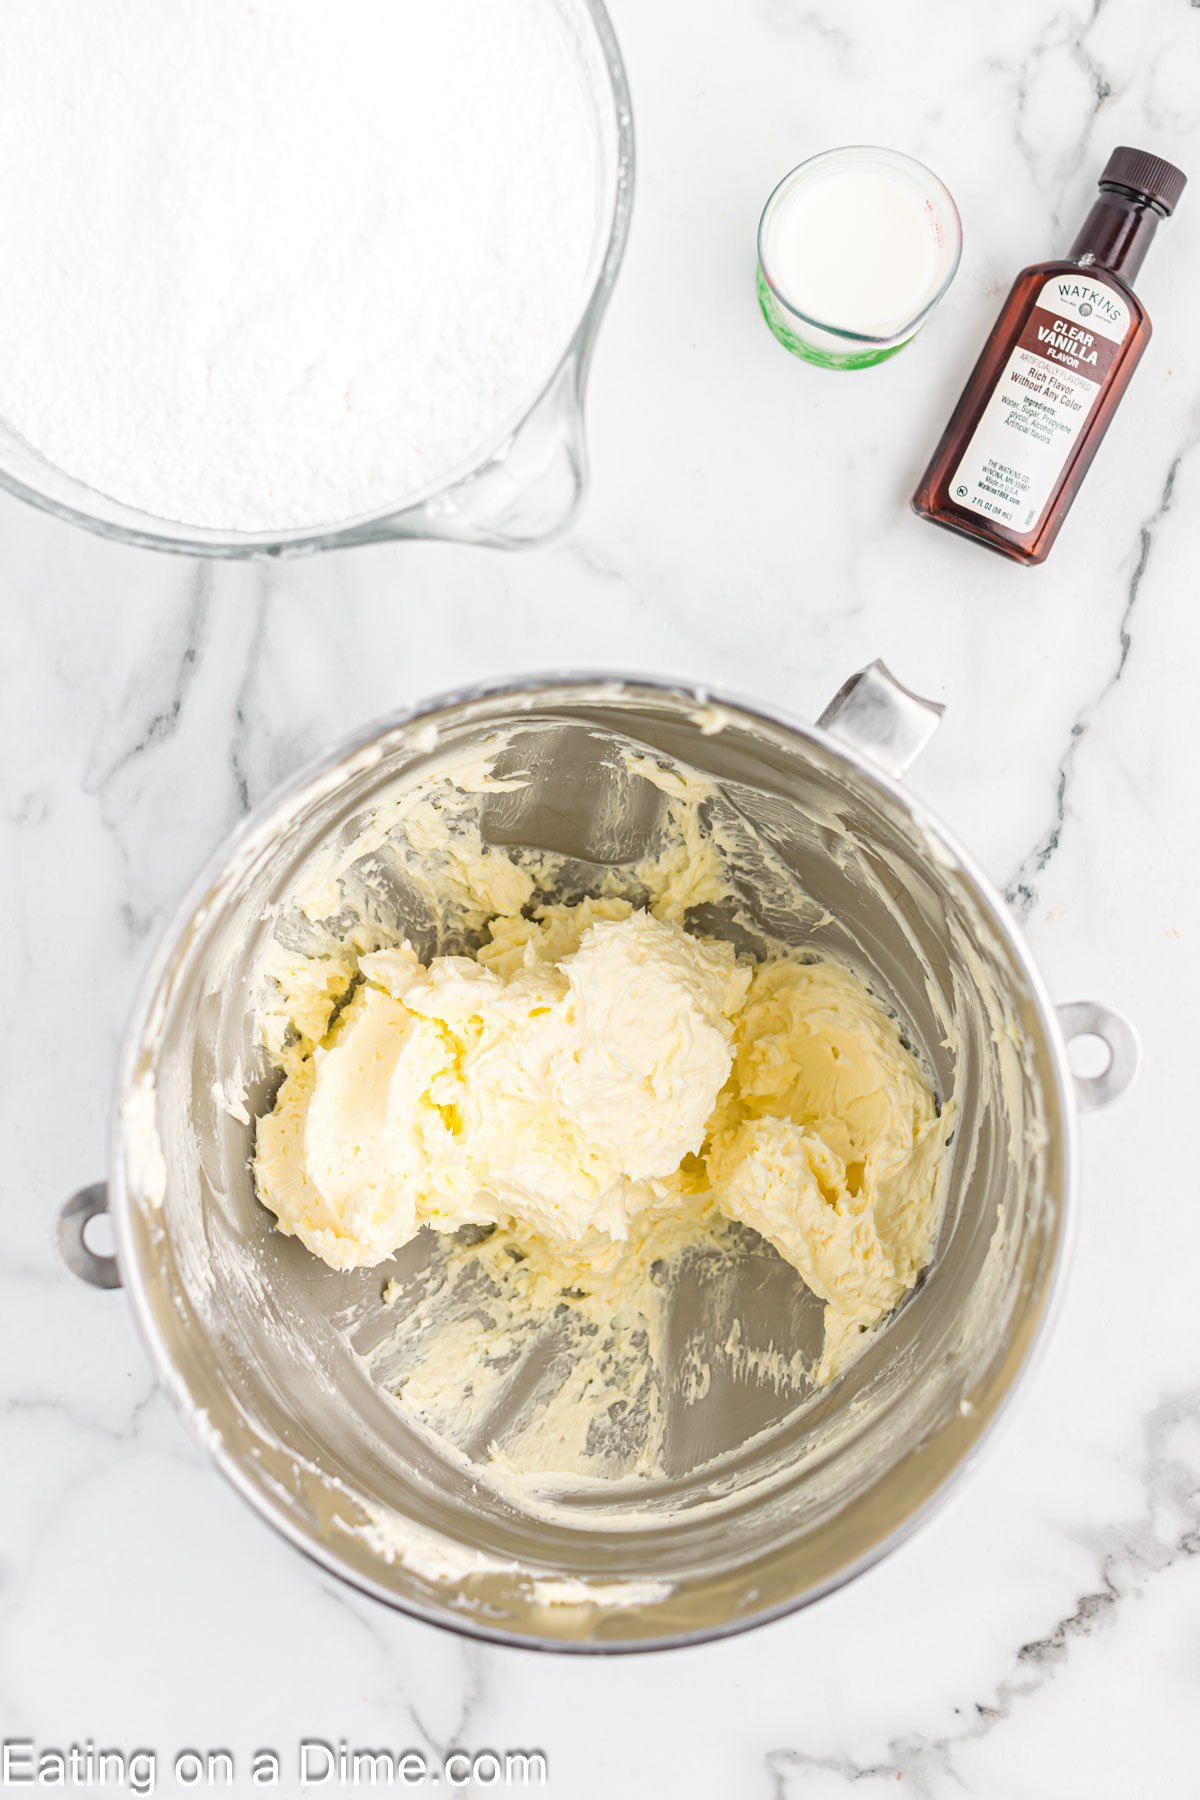
Step 1- In a large bowl cream the butter until smooth.
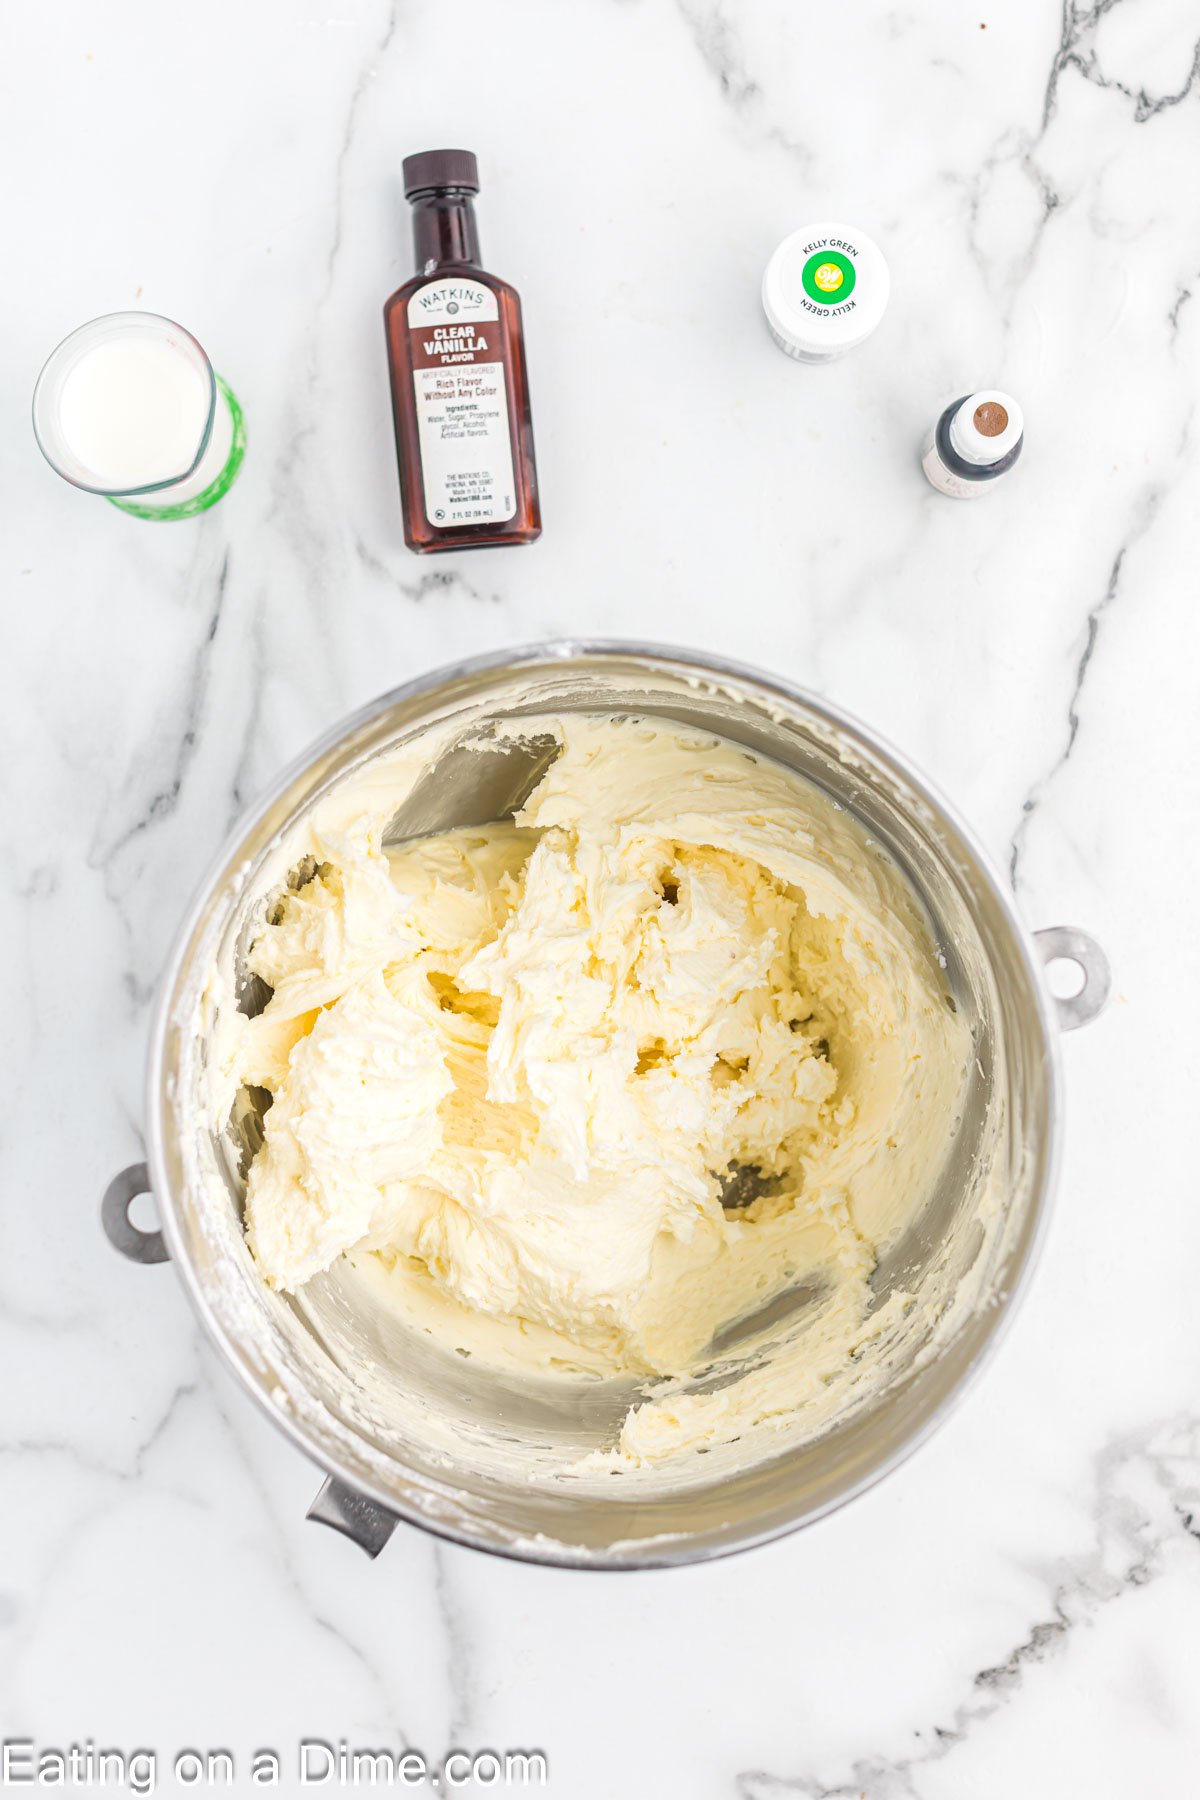
Step 2 – Beat in the confectioners sugar (one cup at a time) on low speed until well combined. Stir in vanilla and milk. Whip until thoroughly mixed and fluffy on a medium-high setting.
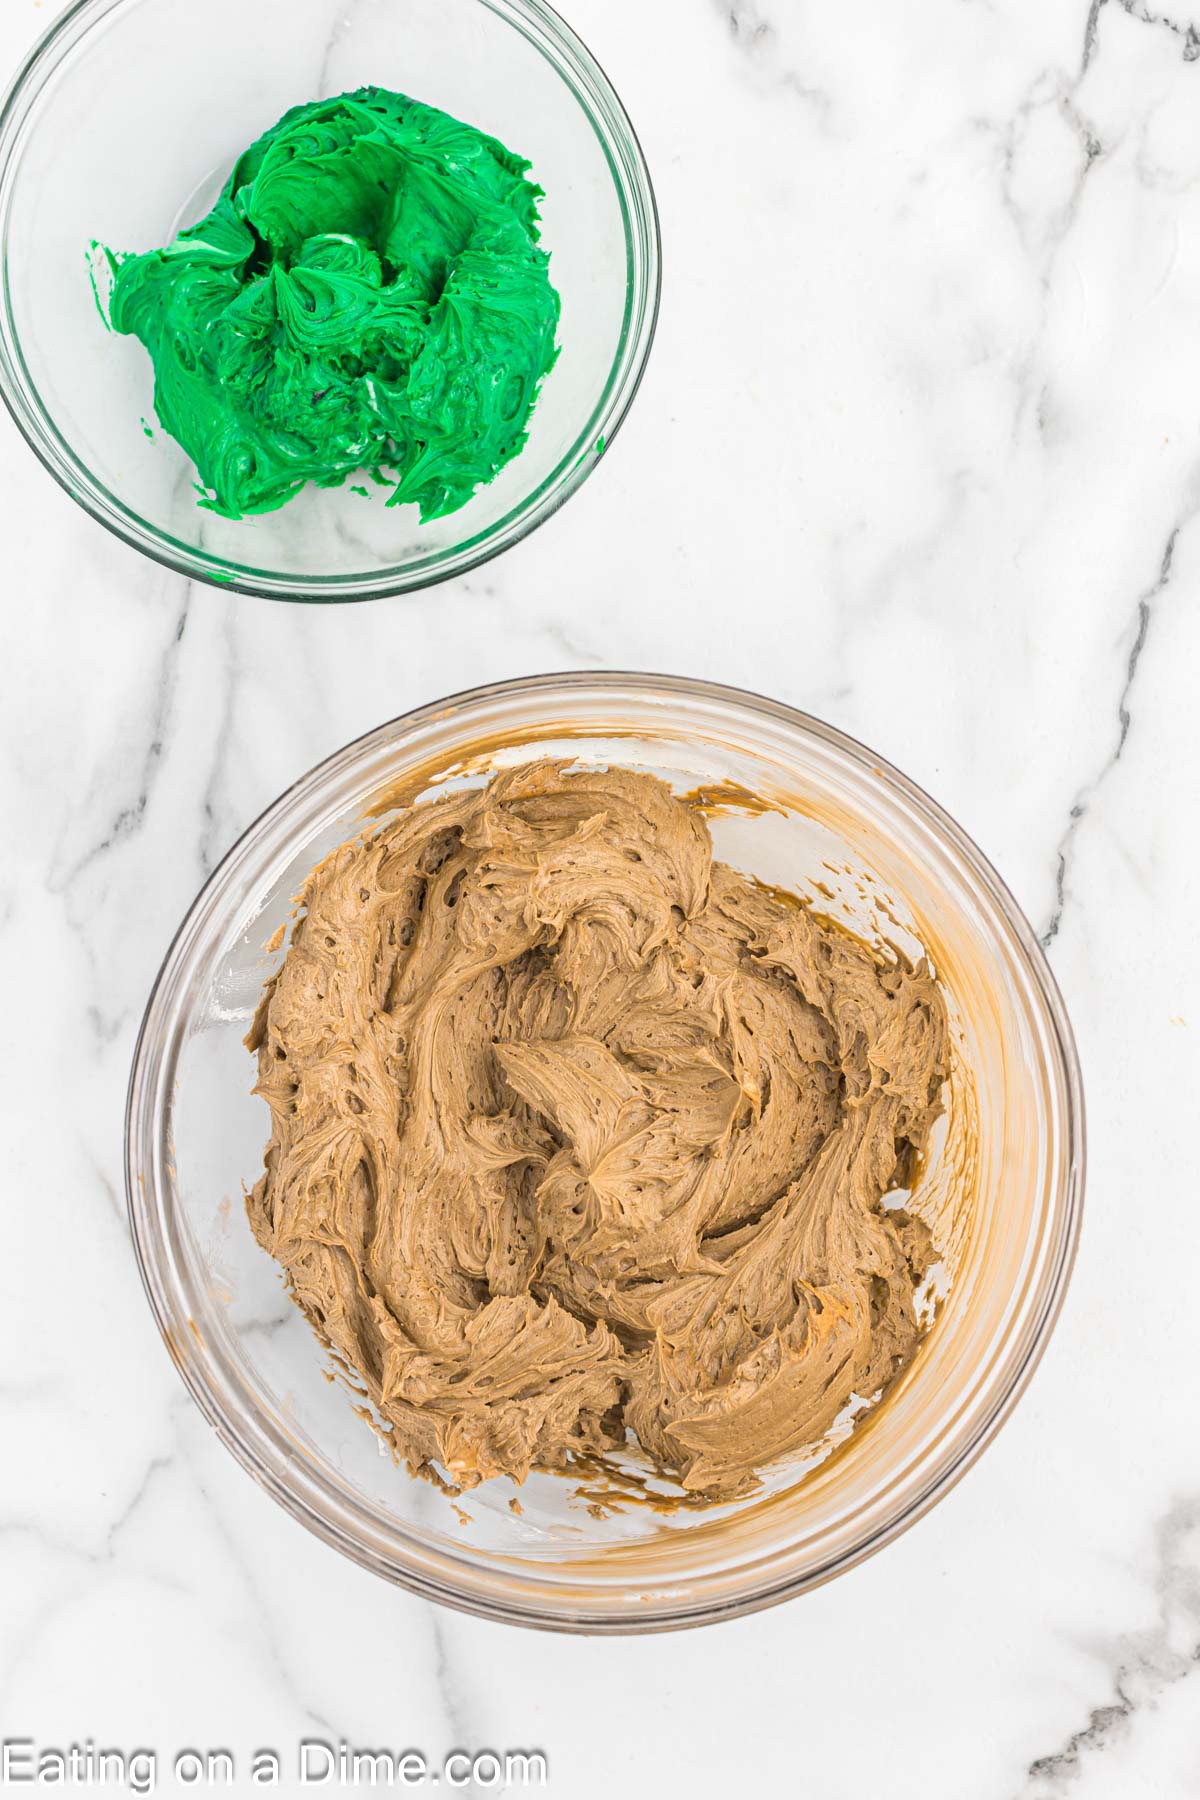
Step 3 – Divide the frosting into 2 bowls. Place approximately 2/3 of the frosting in one bowl and the remaining in a separate bowl. Dye the small bowl of frosting in a vibrant green color for the grass and the larger bowl of frosting brown.
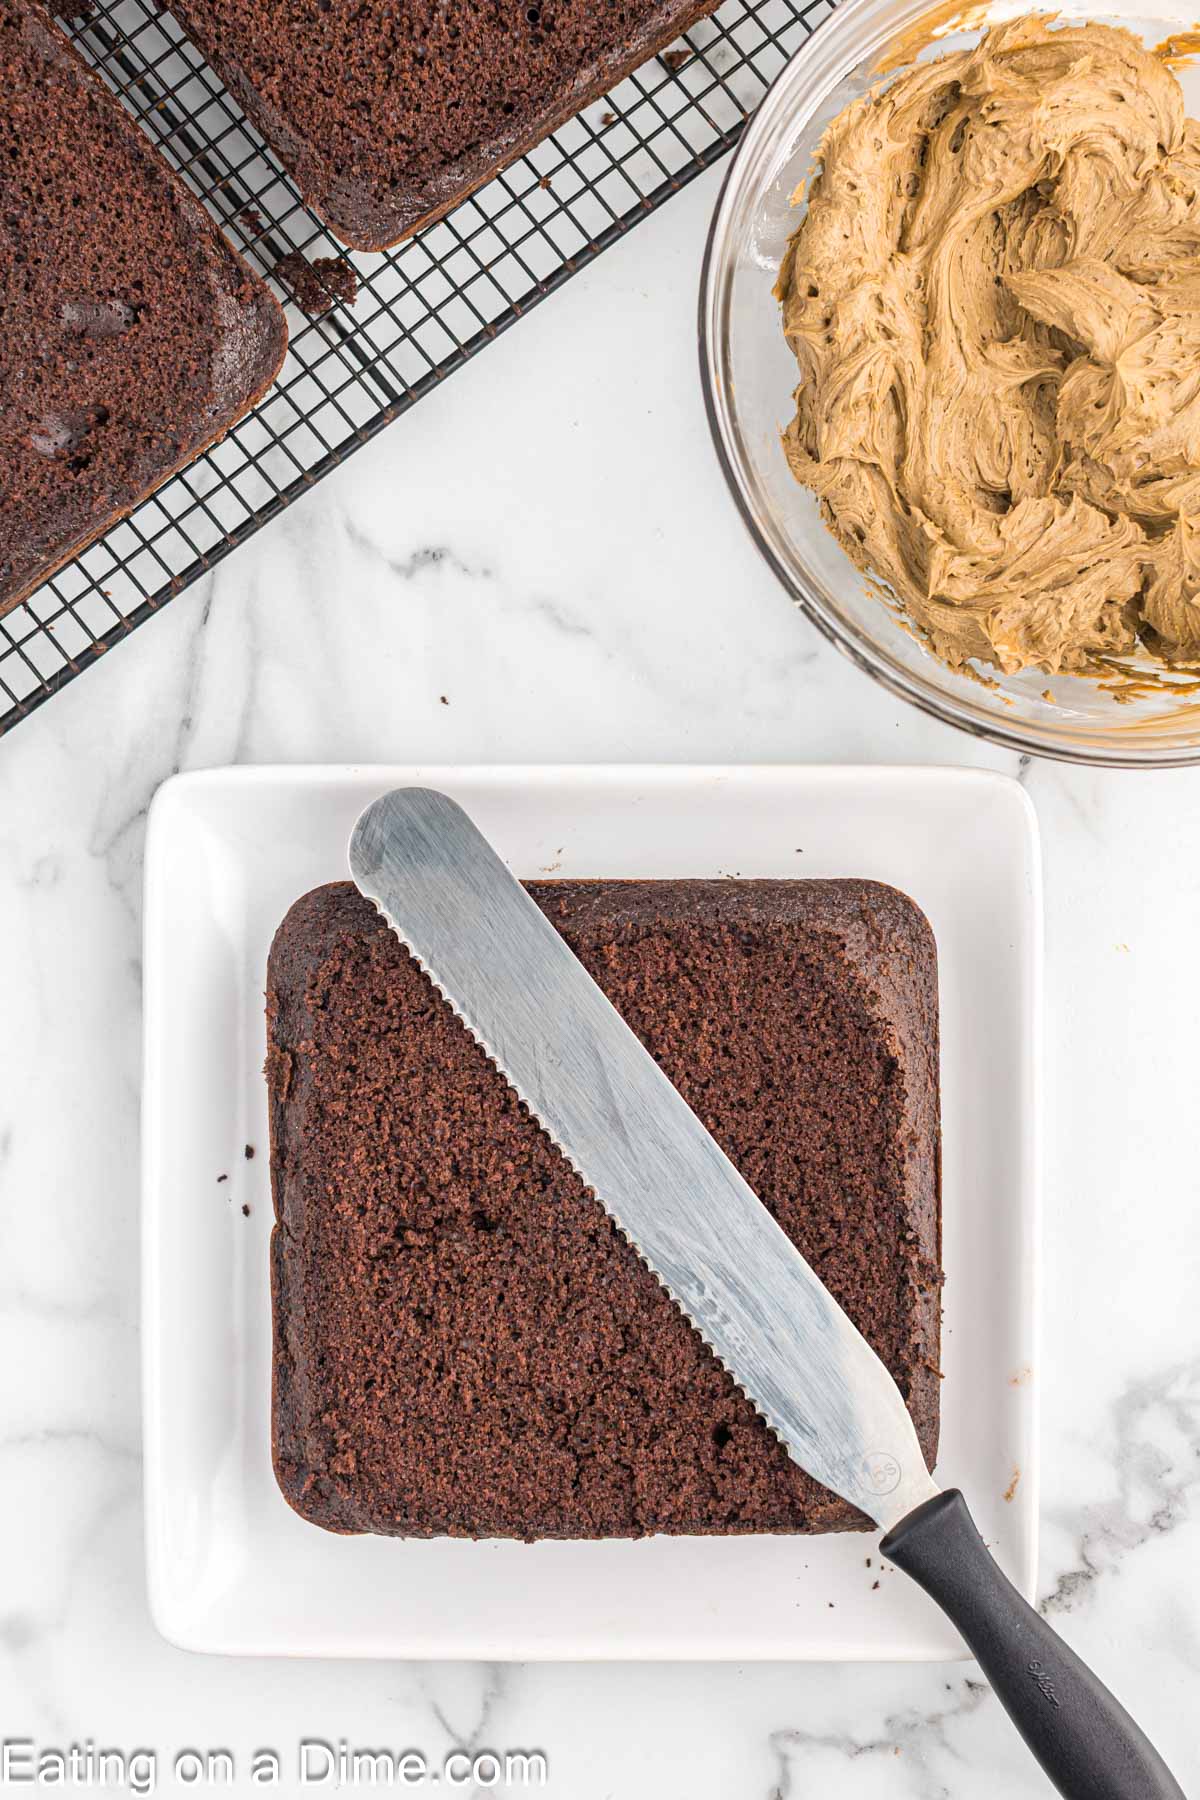
Step 4 – Use a serrated knife to trim the cake layers to make sure that all of the cakes are leveled.
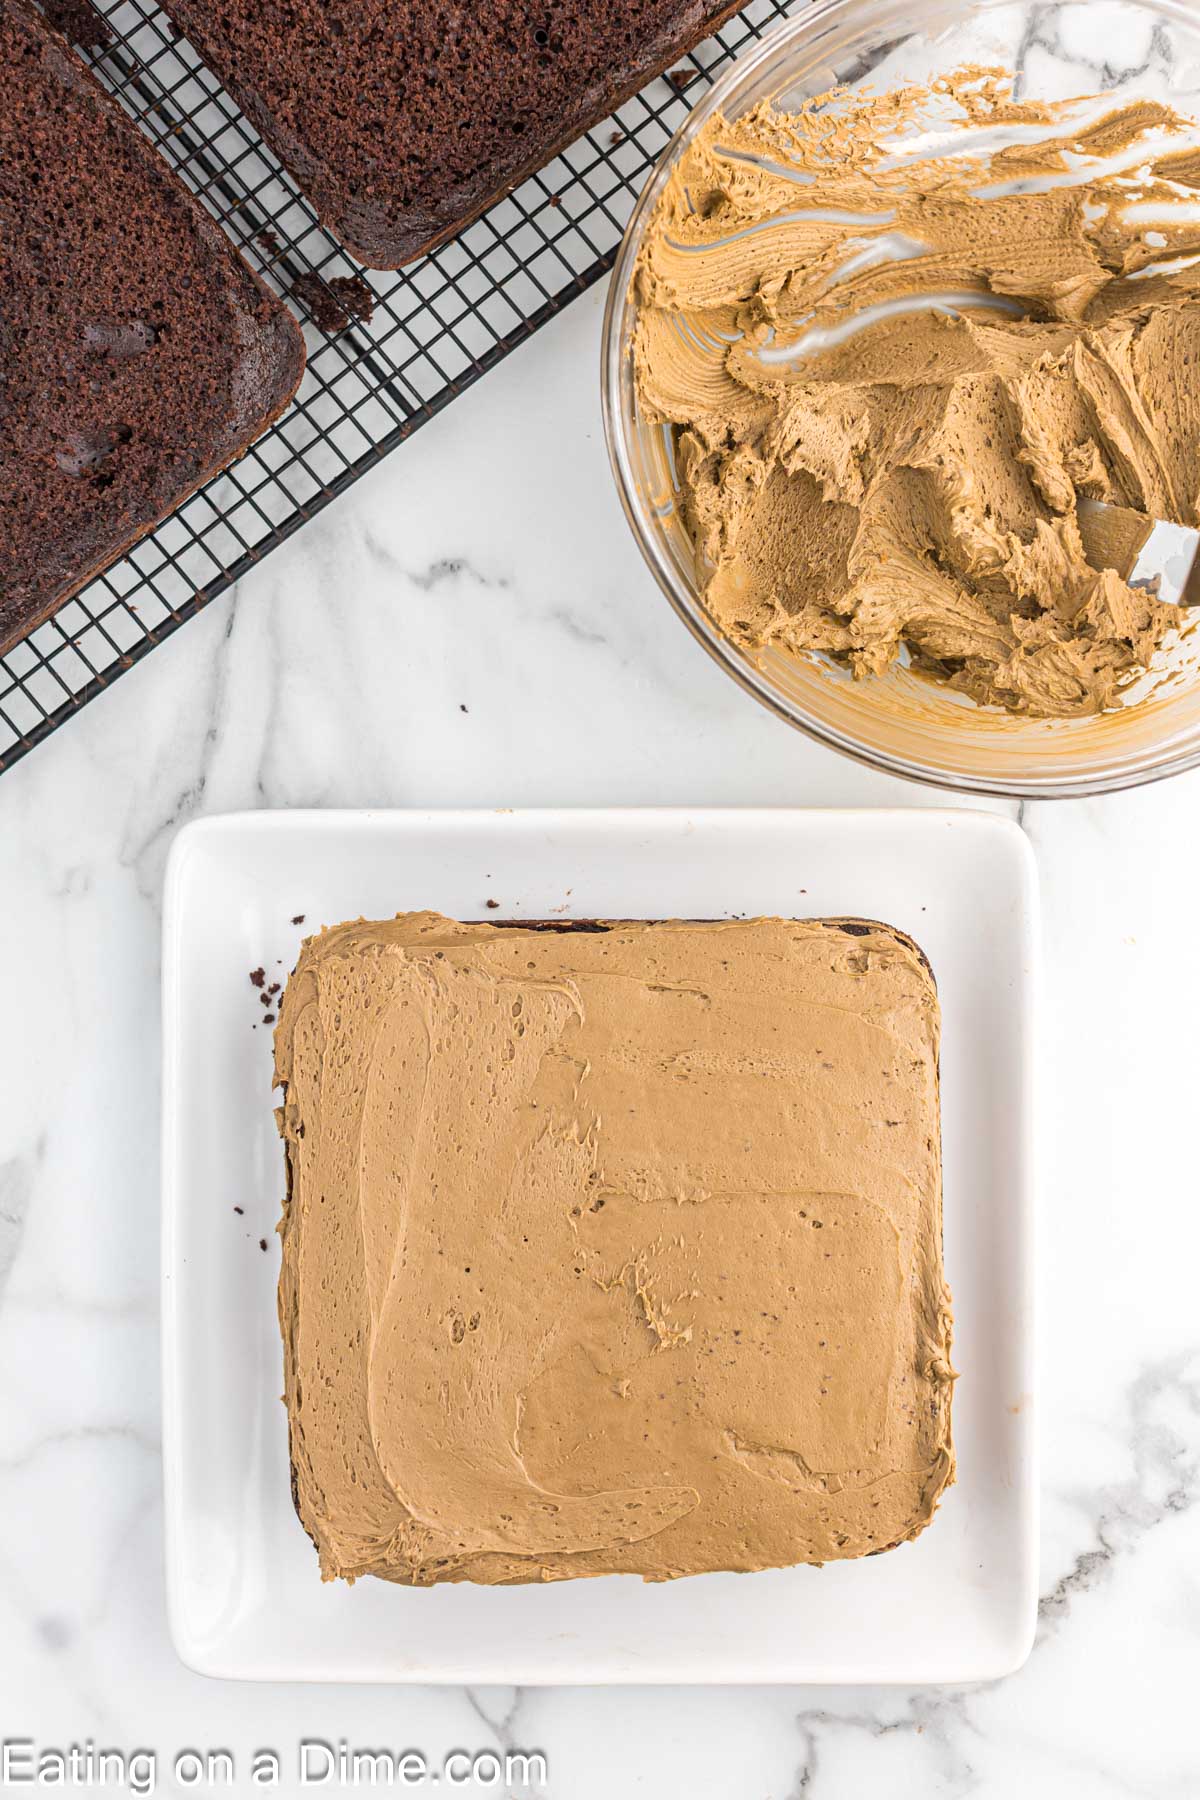
Step 5 – Place one cake on a serving platter or cake stand. Spread a layer of the brown frosting on top.
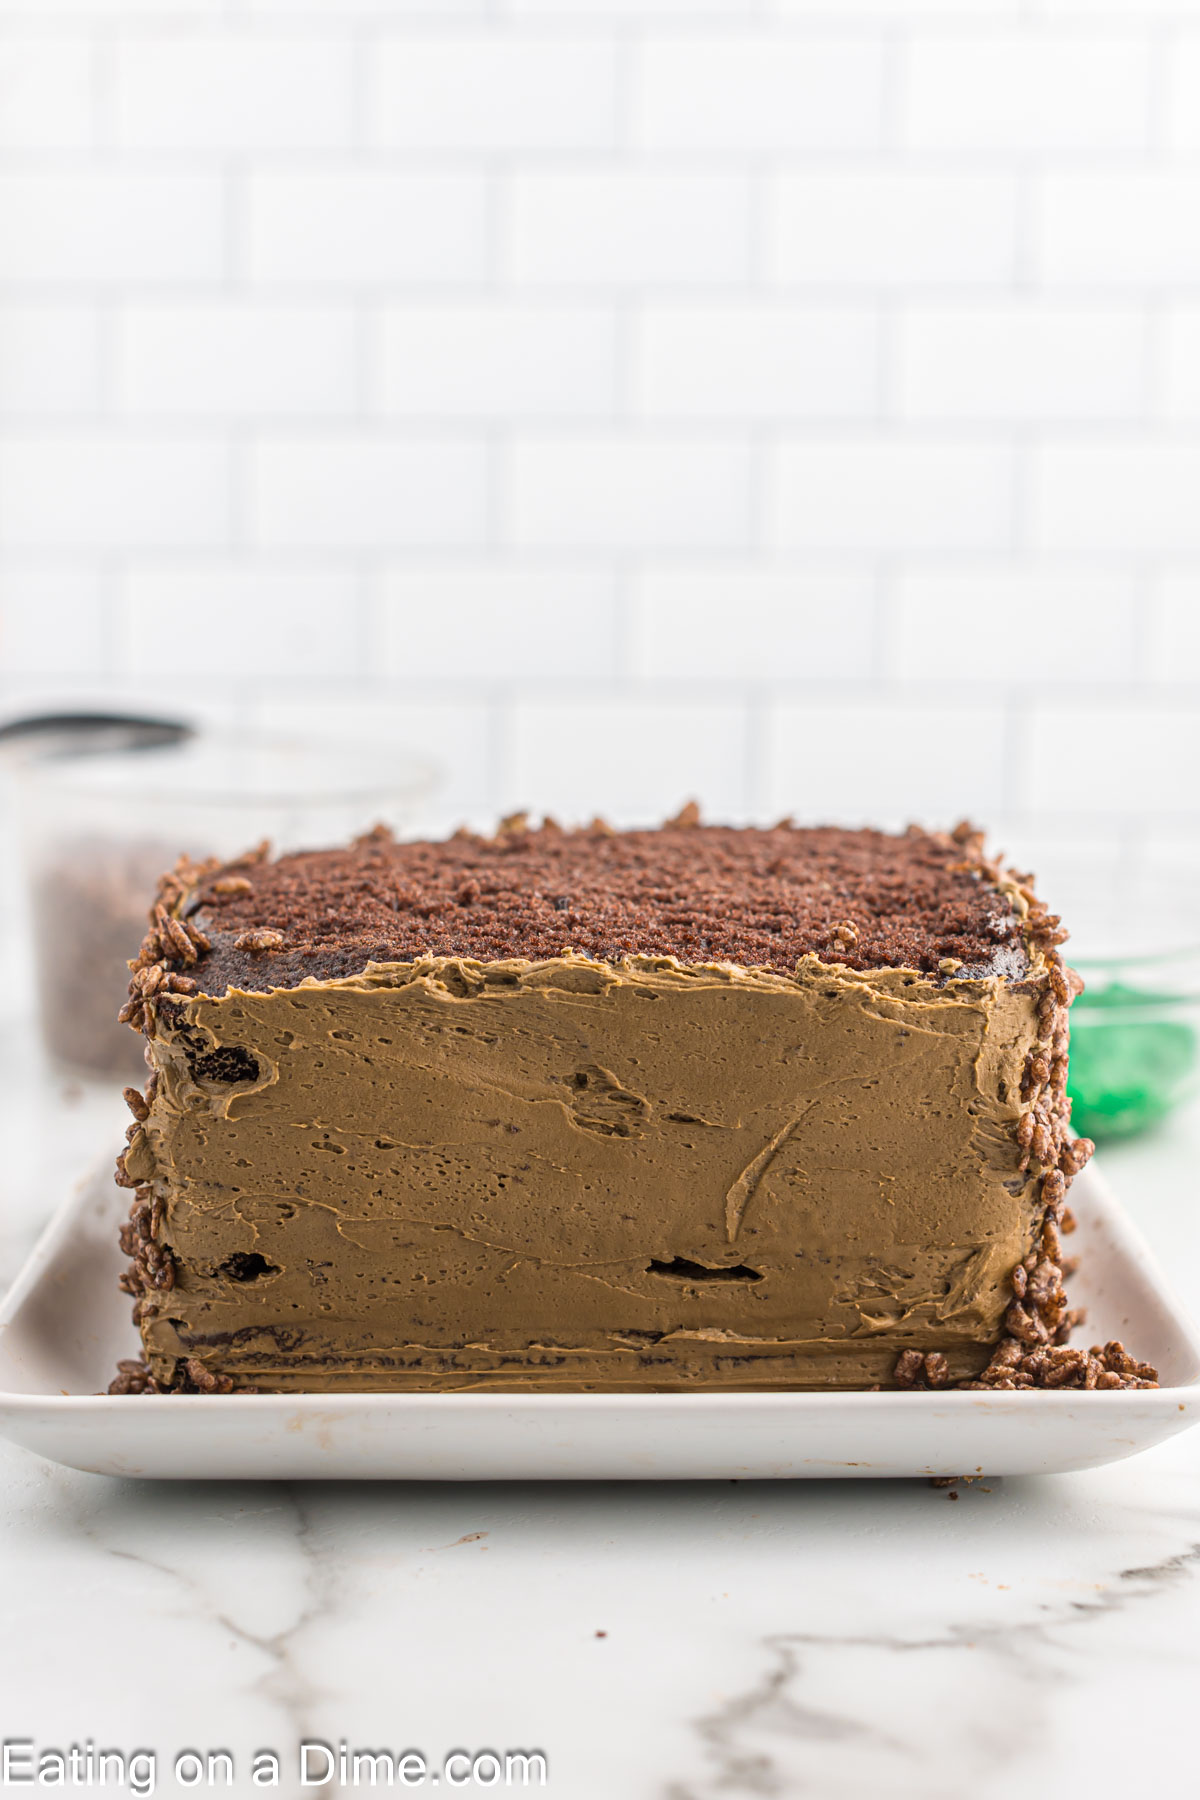
Step 6 – Place the remaining cake on top. Then frosting the sides of the layer cakes with the brown frosting.
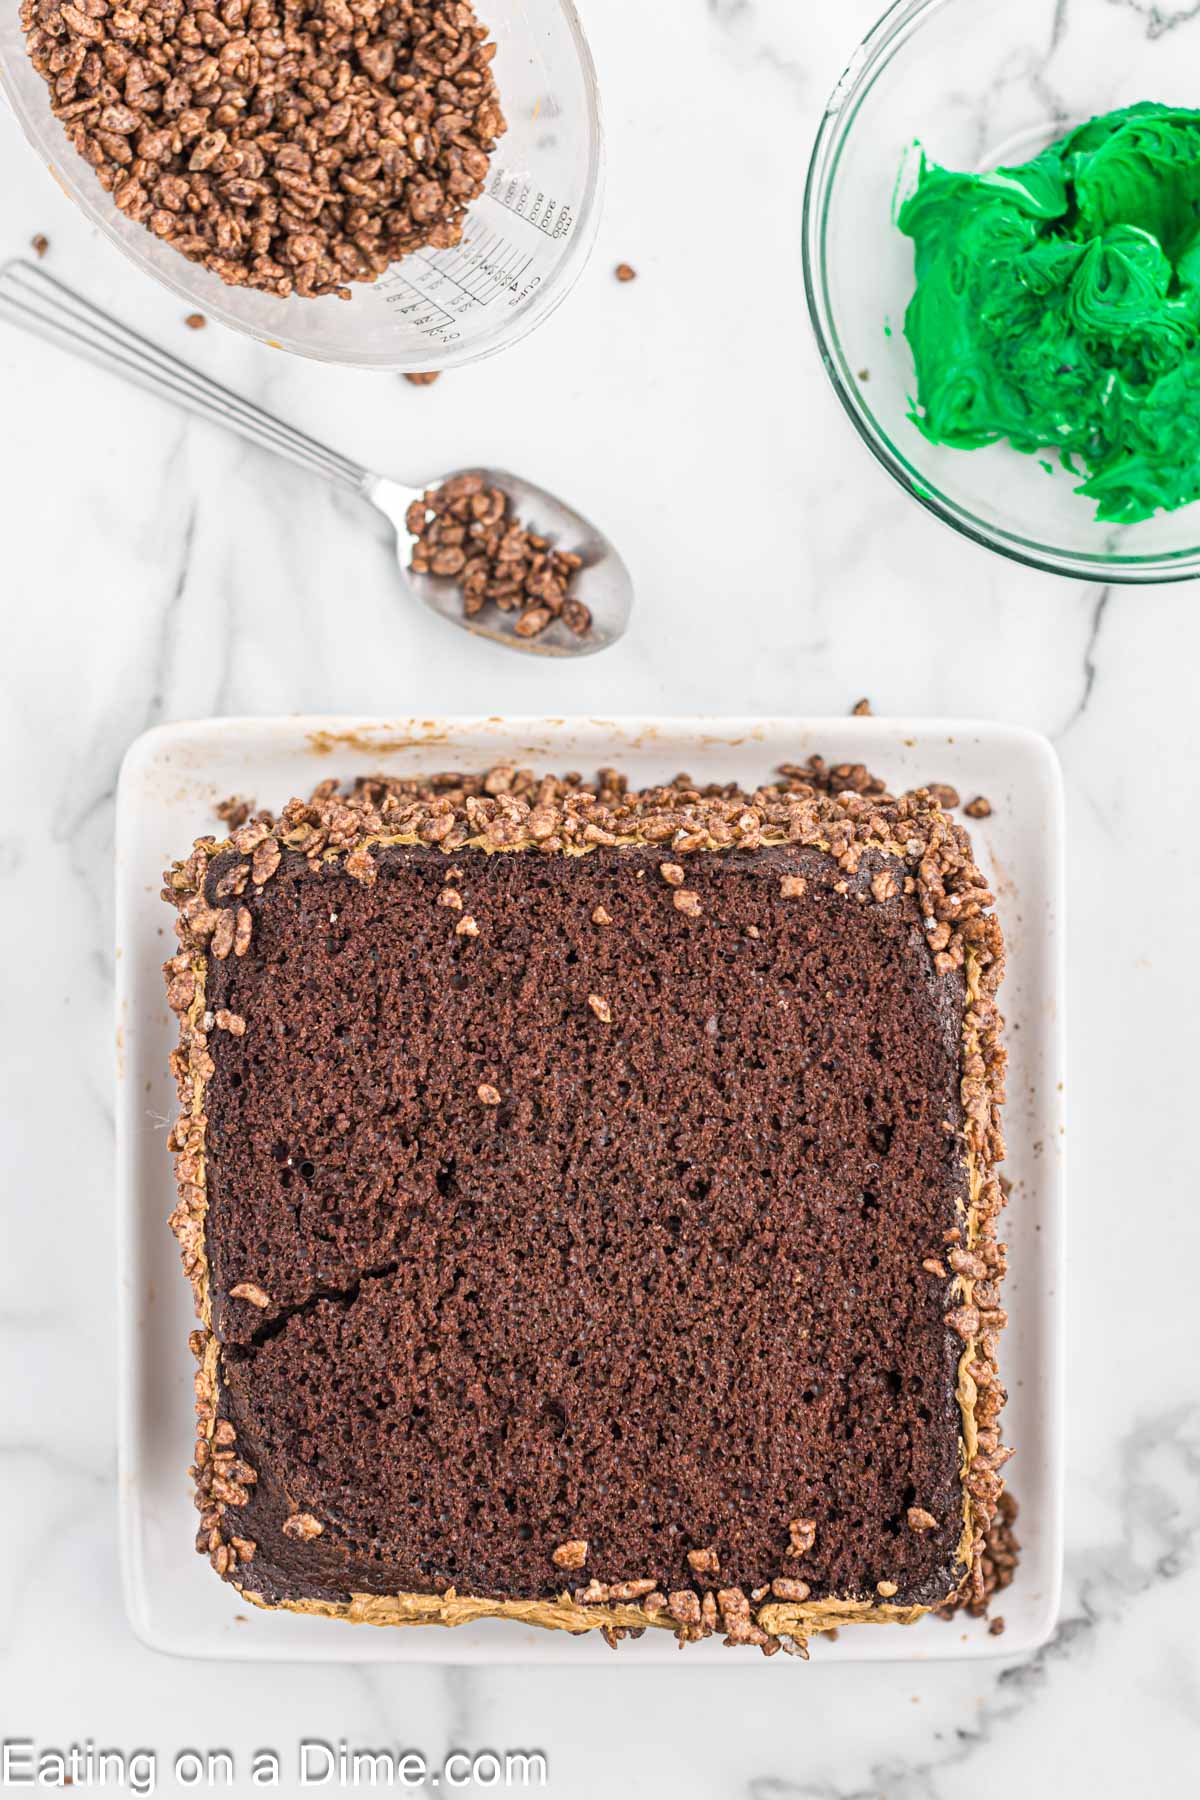
Step 7 – Use a large serving spoon or your hands to press the cocoa Krispies around the sides of the cake. Make sure to do this right away so that they stick easily. You can also use rice krispie.
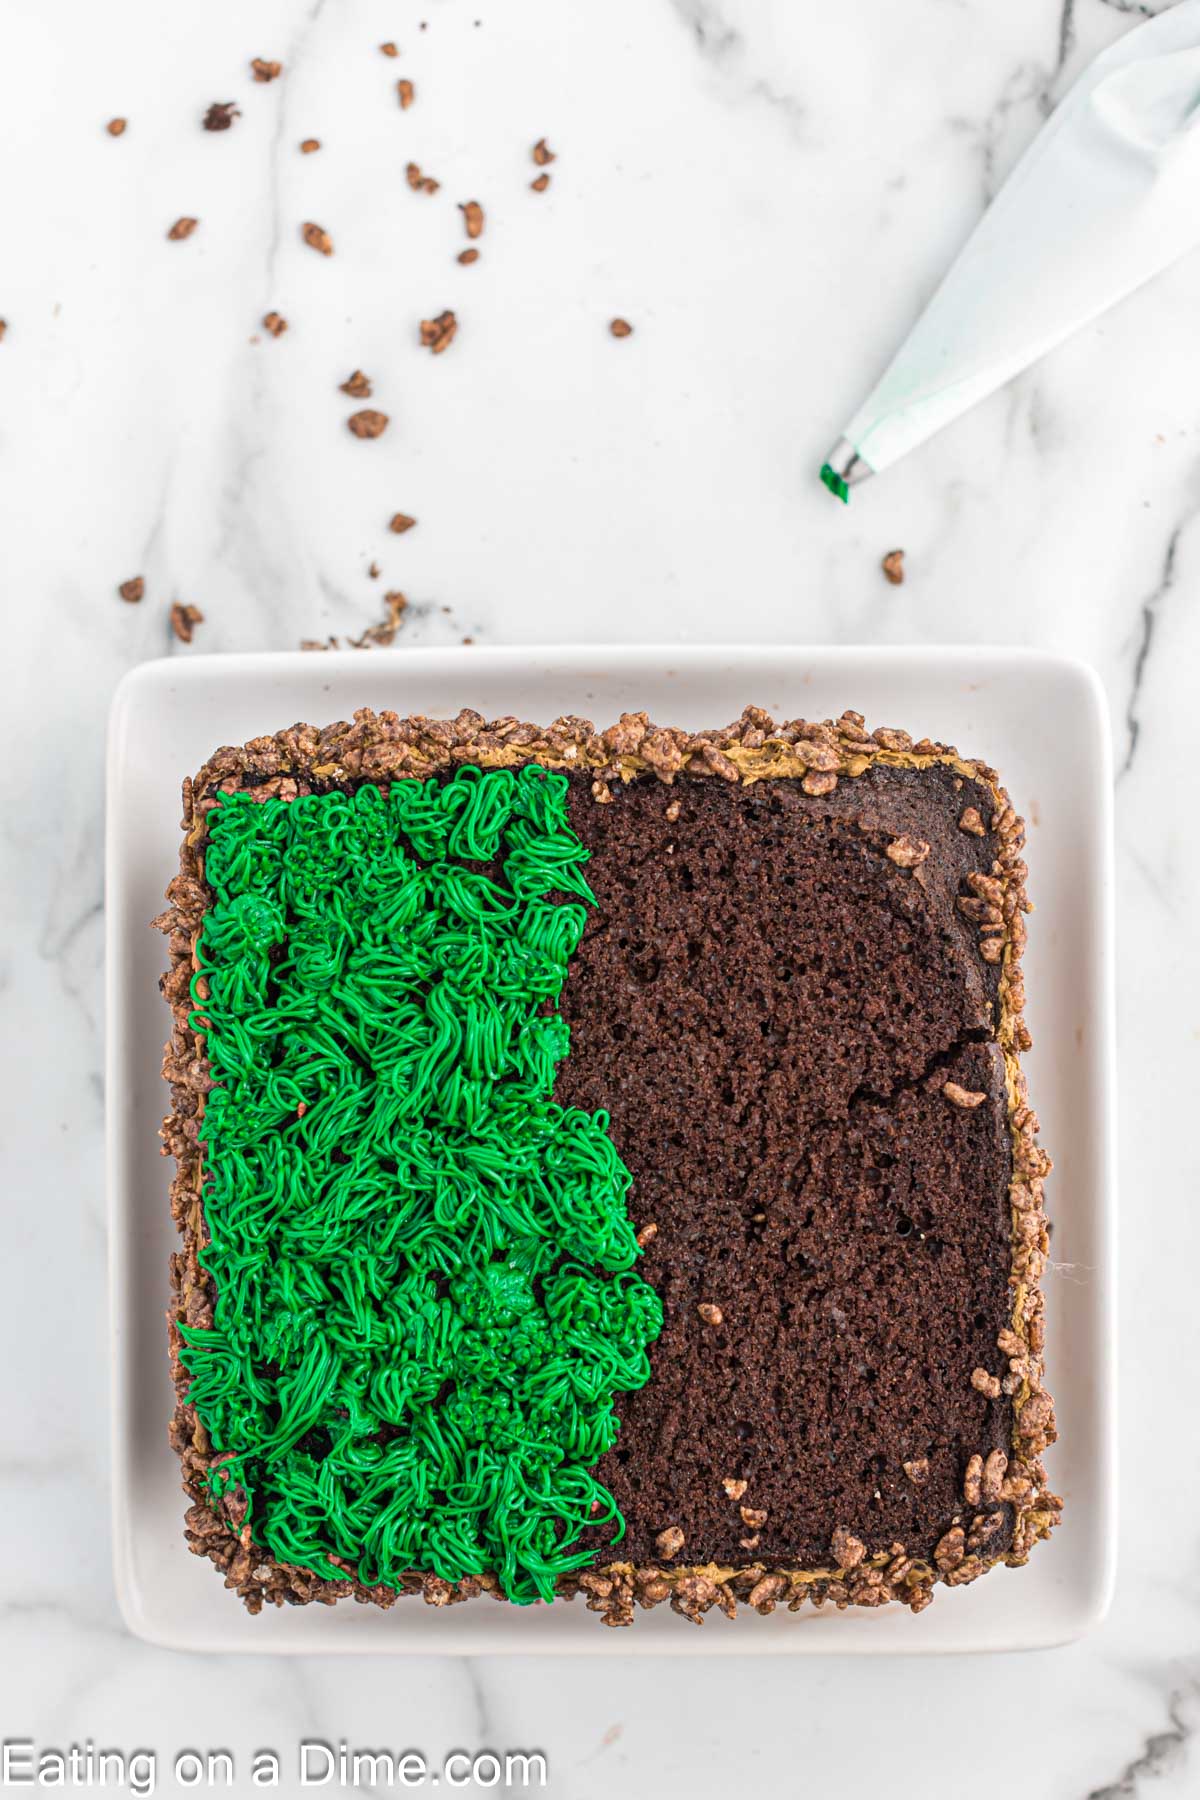
Step 8 – Place the green buttercream frosting in a piping bag fitted with a grass piping tip (I used Wilton #233). Cover the top with the green frosting.
Expert Tips:
- Adding Cocoa Krispies – The best way to add the cereal to the sides, is to simply filled the serving spoon with crushed cereal. Then hold the spoon against the side of the cake. Slowly tilted the spoon so cereal poured over the side. Then press the cereal against the cake.
- Piping Green Frosting – I then used the Wilton Grass Tip to make grass all over the top of the cake. Squeeze the piping bag to create a little patch of grass and then pull away to make the icing look like grass on top of the cake.
- Food Coloring – Be sure to use Gel Coloring instead of regular food coloring. You can also use green fondant or green icing.
Frequently Asked Questions:
Store this awesome Minecraft themed birthday cake covered with plastic wrap at room temperature. It will stay fresh for about 4 days.
Yes, you can easily decorate the Minecraft Creeper Cake up to 24 hours before serving.
More Easy Birthday Cake Recipes:
We love hearing from you. If you make this Minecraft grass block birthday cake recipe, make sure to leave us a comment.
Minecraft Birthday Cake
Ingredients
For the Cake:
- 2 boxes Chocolate Cake Mix
- 2 cups Water divided
- 1 cup Vegetable Oil divided
- 6 Eggs divided
For the Frosting:
- 2 cups Butter softened
- 2 tsp Clear Vanilla Extract
- 8 cups sifted Confectioners Sugar
- 4 Tbsp Milk
- Green Gel Food Coloring
- Brown Gel Food Coloring
- For the Decorations:
- 3 cups Cocoa Krispies
Instructions
For the Cake:
- Preheat the oven to 350 degrees Fahrenheit and spray 3 8 inch square cake pans with a non-stick cooking spray.
- In 2 separate bowls, mix together the cake mix, 1 cup of water, ½ cup vegetable oil and 3 eggs.
- Fill the prepared cake pans with the cake batter filling them up approximately 2/3 of the way full. You will not use all of the cake batter to fill the cake pans, so discard any remaining batter.
- Bake the cakes for 23-28 minutes until a toothpick inserted into the center of the cakes comes out clean.
- Let the cakes cool for 10 minutes and then carefully remove from the pans and allow them to cool completely on wire racks.
For the Frosting:
- In a large bowl cream the butter until smooth.
- Beat in the confectioners sugar (one cup at a time) on low speed until well combined.
- Stir in vanilla and milk. Whip until thoroughly mixed and fluffy on a medium-high setting.
- Divide the frosting into 2 bowls. Place approximately 2/3 of the frosting in one bowl and the remaining in a separate bowl.
- Dye the small bowl of frosting in a vibrant green color for the grass and the larger bowl of frosting brown.
To Assemble:
- Use a serrated knife to trim the cake layers to make sure that all of the cakes are leveled.
- Place one cake on a serving platter or cake stand. Spread a layer of the brown frosting on top.
- Repeat the process with another cake.
- Place the remaining cake on top.
- Then frosting the sides of the cake with the brown frosting.
- Use a large serving spoon or your hands to press the cocoa Krispies around the sides of the cake. Make sure to do this right away so that they stick easily.
- Place the green frosting in a piping bag fitted with a grass piping tip (I used Wilton #233). Make sure that the frosting is thin enough to go through the grass tip.
- Pipe the green frosting to the top of the cake. Squeeze the piping bag to create a little patch of grass and then pull away to make the icing look like grass on top of the cake.
- Continue this process until the top of the cake is covered in green grass frosting.
- Then the cake is ready to slice, serve and enjoy!
